Moving from Vesta desktop
Upload a Vesta desktop project (.gmd) to Vesta Online, open it, and see what comes across; how desktop saves to and opens from the cloud.
Vesta Online and Vesta desktop use the same project file, a .gmd. A project you built in Vesta desktop goes to Vesta Online by uploading that file from the Projects page, and a project in Vesta Online can be downloaded as a file for desktop. One subscription covers Vesta Online and Vesta desktop. The same analyses run in each. Vesta Online was formerly called Vesta Cloud; the desktop app still says “cloud”. The Vesta Online steps below were run on Vesta Online with a desktop project file (a soil organic carbon project BioMedware built); the desktop steps are stated from the desktop app’s source and were not run for this page.
Upload a desktop project to Vesta Online
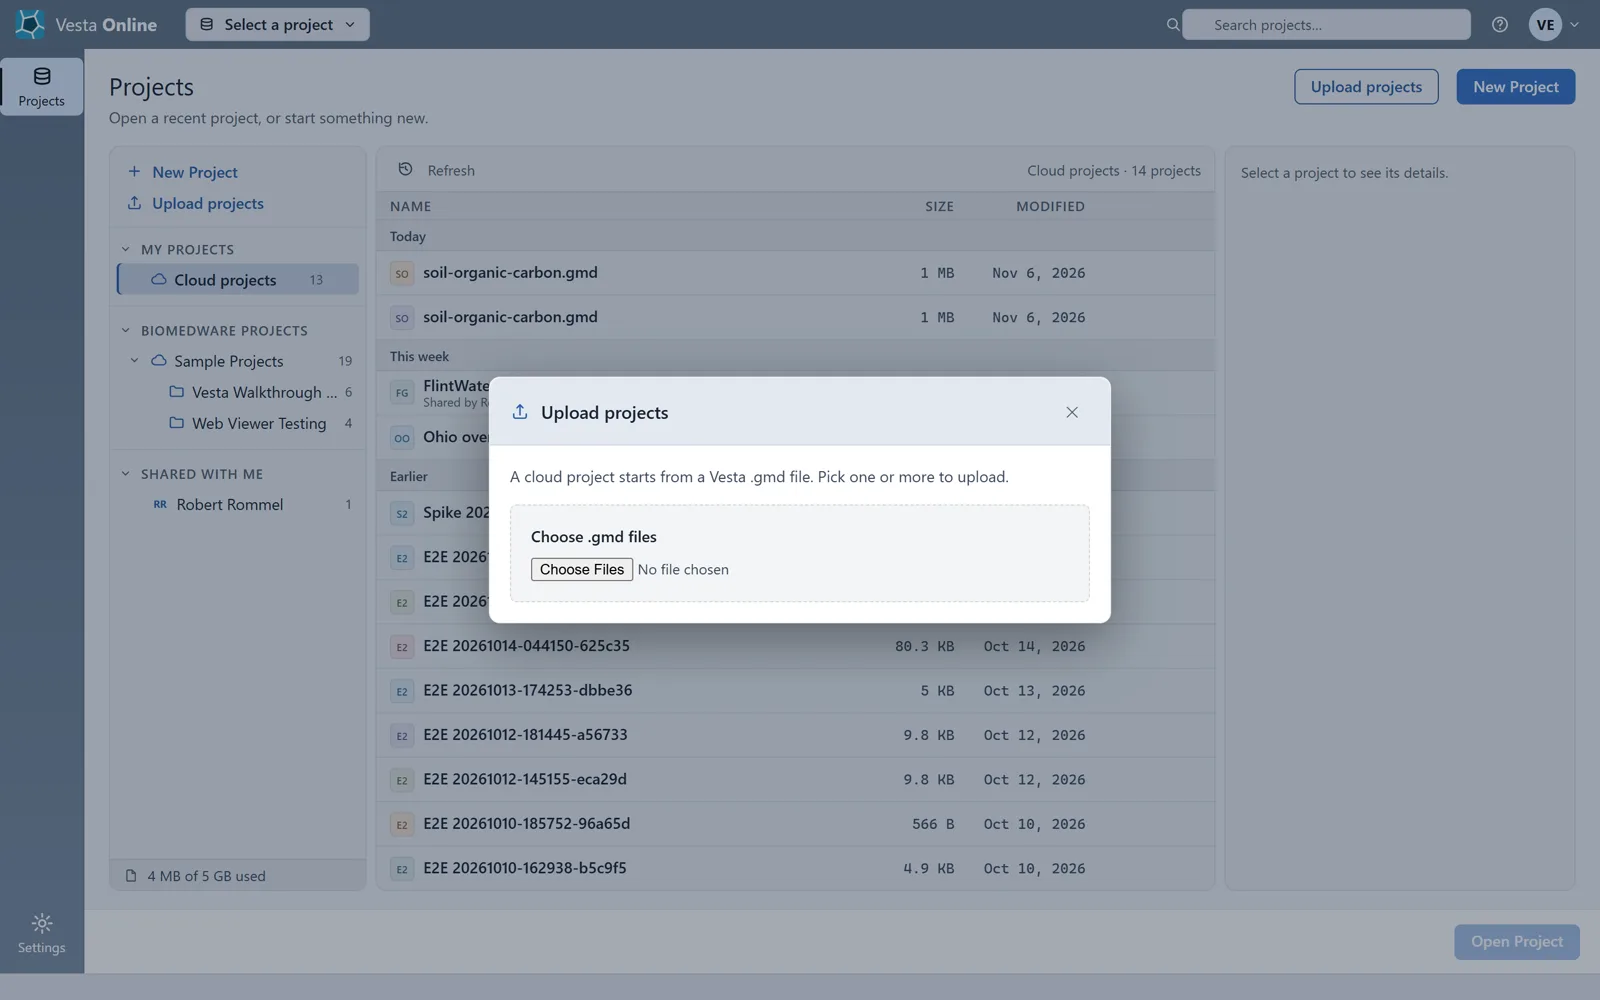
Section titled “Upload a desktop project to Vesta Online”- Choose Upload projectsOn the Projects page, choose Upload projects at the top right. The dialog says A cloud project starts from a Vesta .gmd file. Pick one or more to upload.
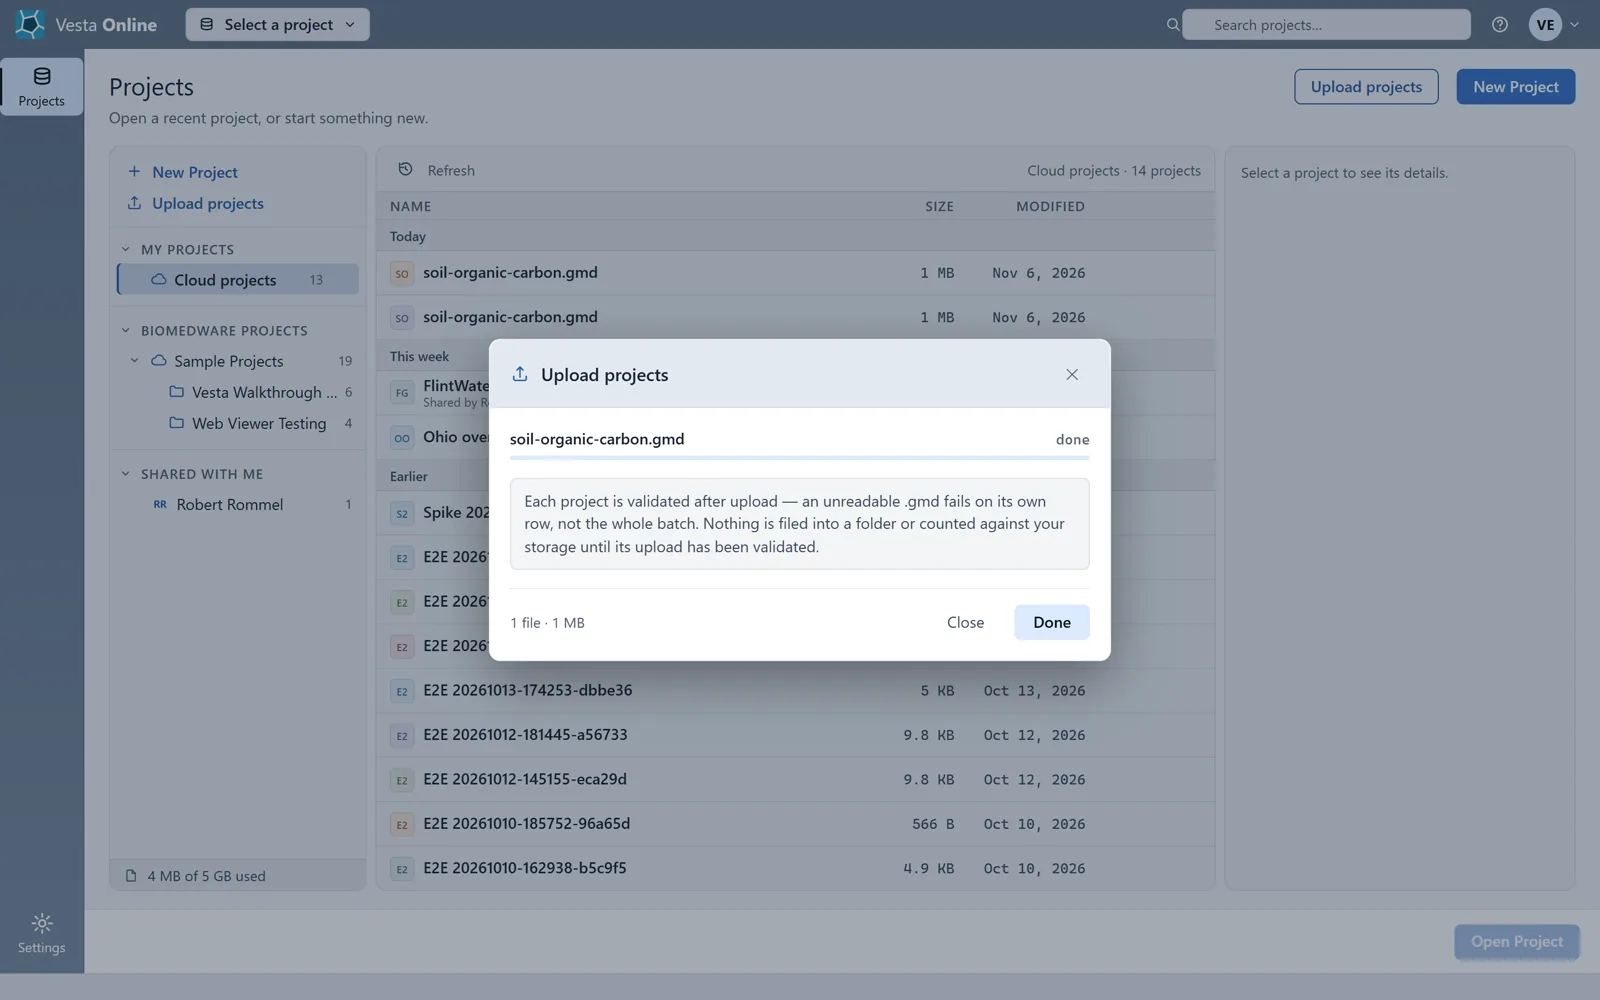
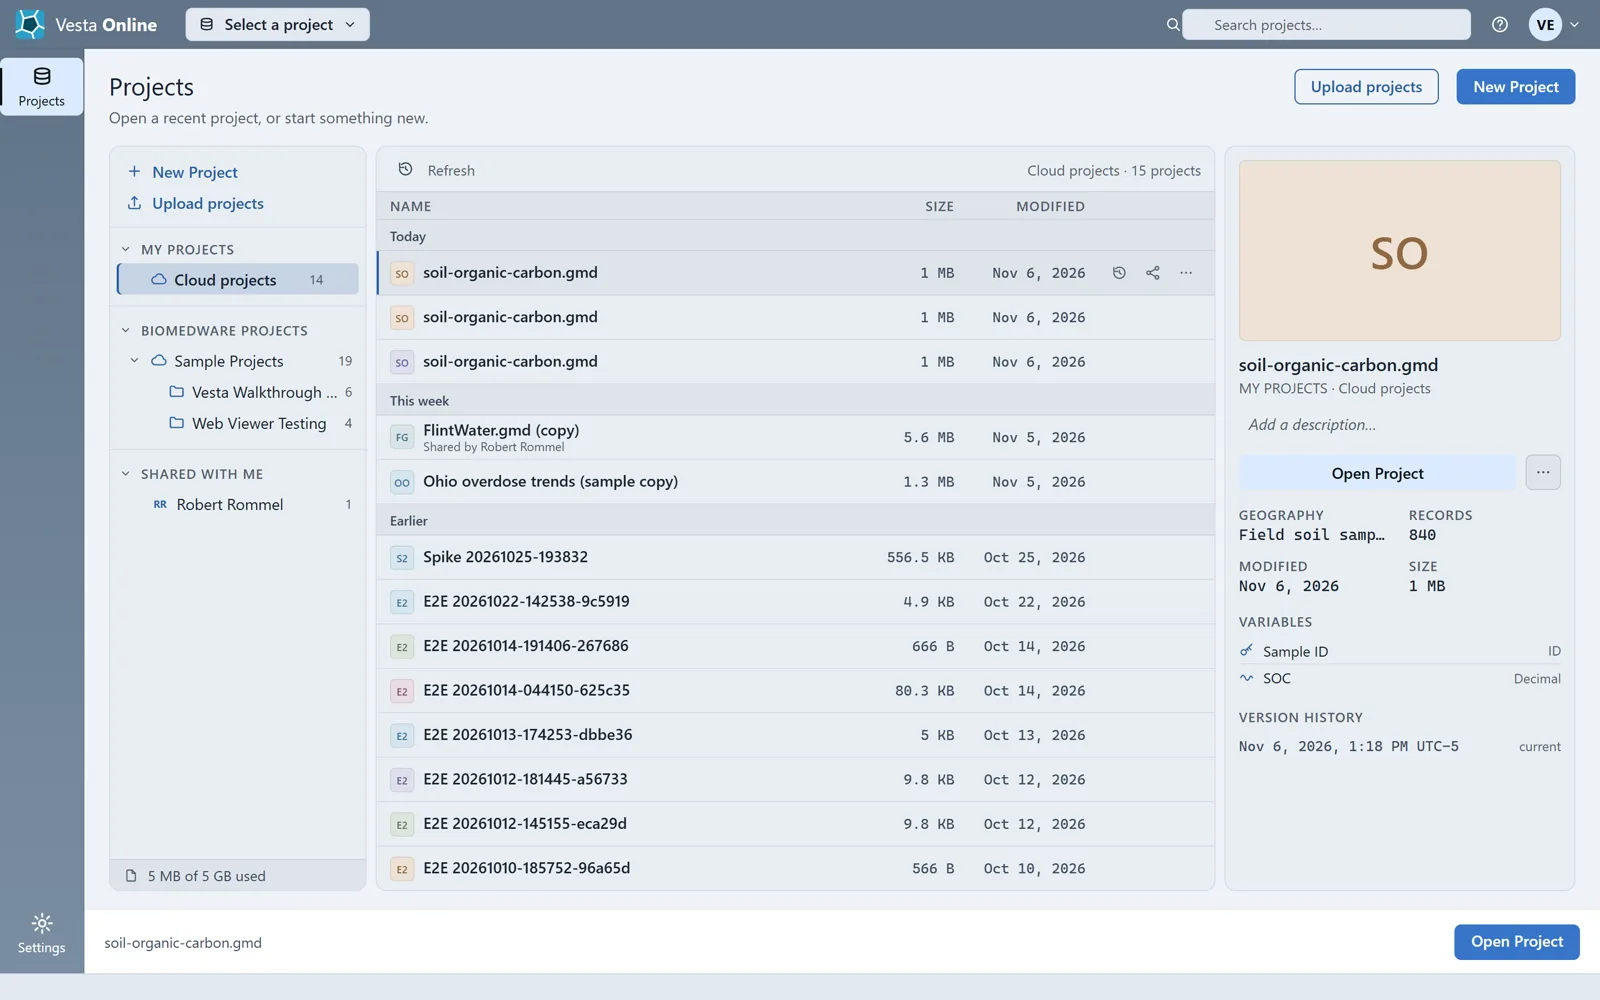
- Pick the .gmd fileUse Choose Files to pick the .gmd file. Each file shows a progress bar and a status. Files upload one at a time, and each is checked after it uploads. When the row says done, the project is in your list; choose Done. The project is named after its file, including .gmd: here soil-organic-carbon.gmd, 1 MB.
- Find the project in the listThe project appears under Cloud projects. Select its row to see the details panel: its geography (here Field soil samples plus one more dataset), its record count (840), its size, the variables of that first dataset (Sample ID and SOC) and its version history, marked current.
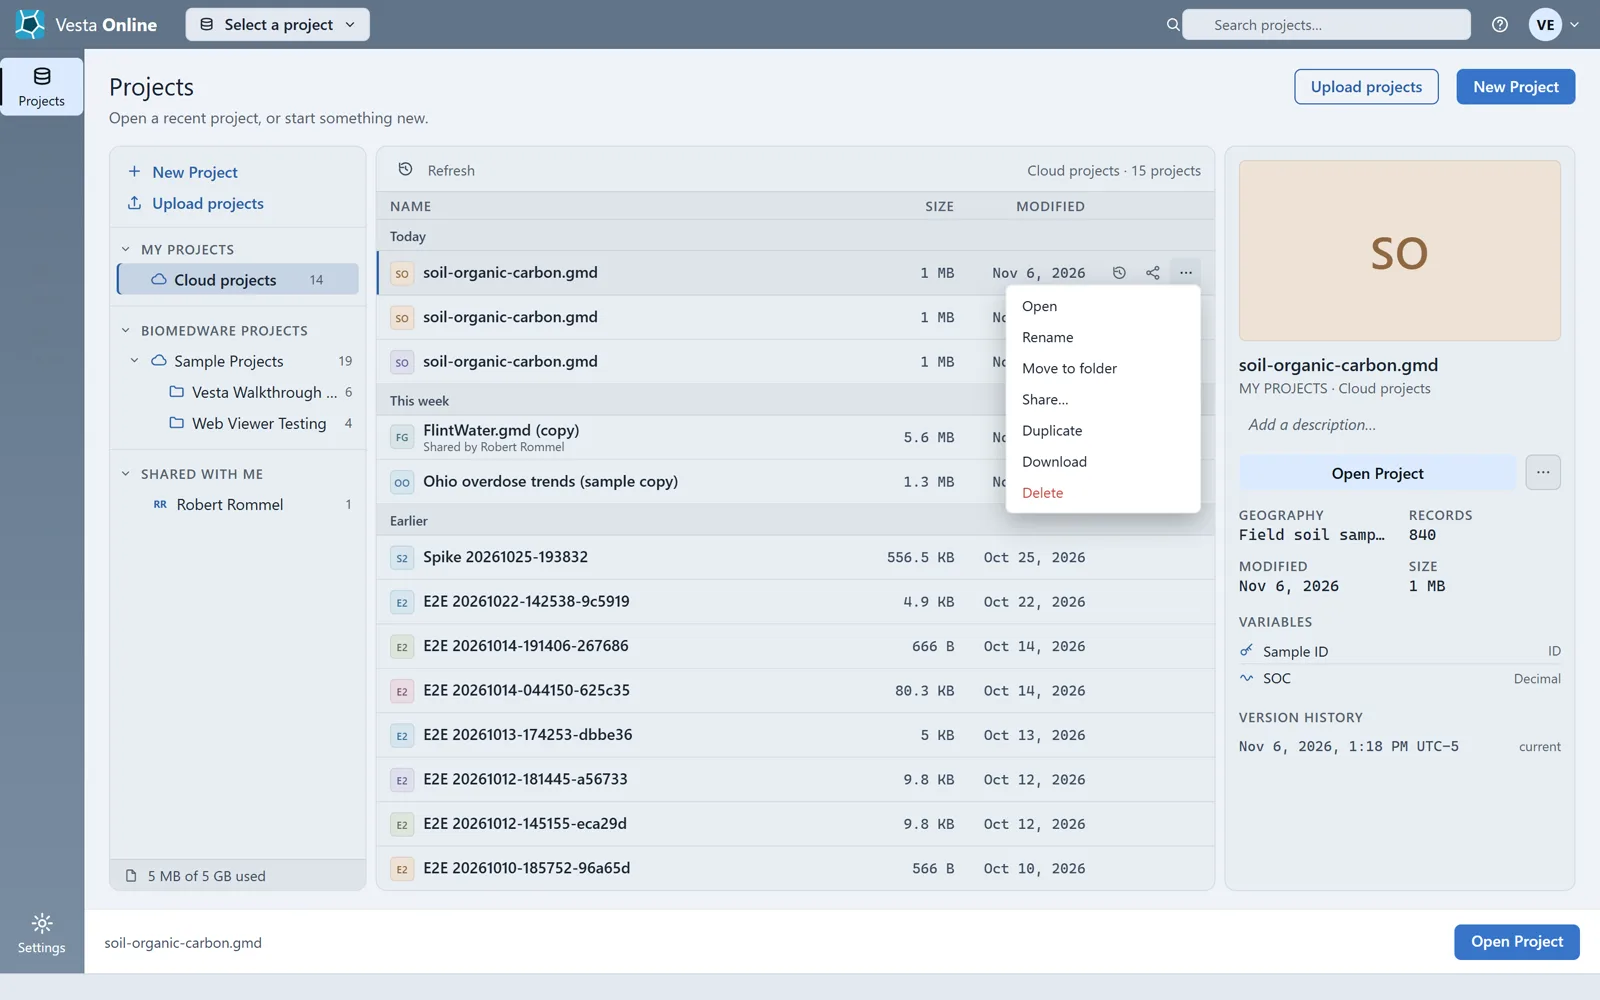
- Download a project for desktopThe way back to desktop is on the same row. Choose the row's More actions menu: it lists Open, Rename, Move to folder, Share…, Duplicate, Download and Delete. Download sends the project's file to your browser. This walk opened the menu and did not run the download.
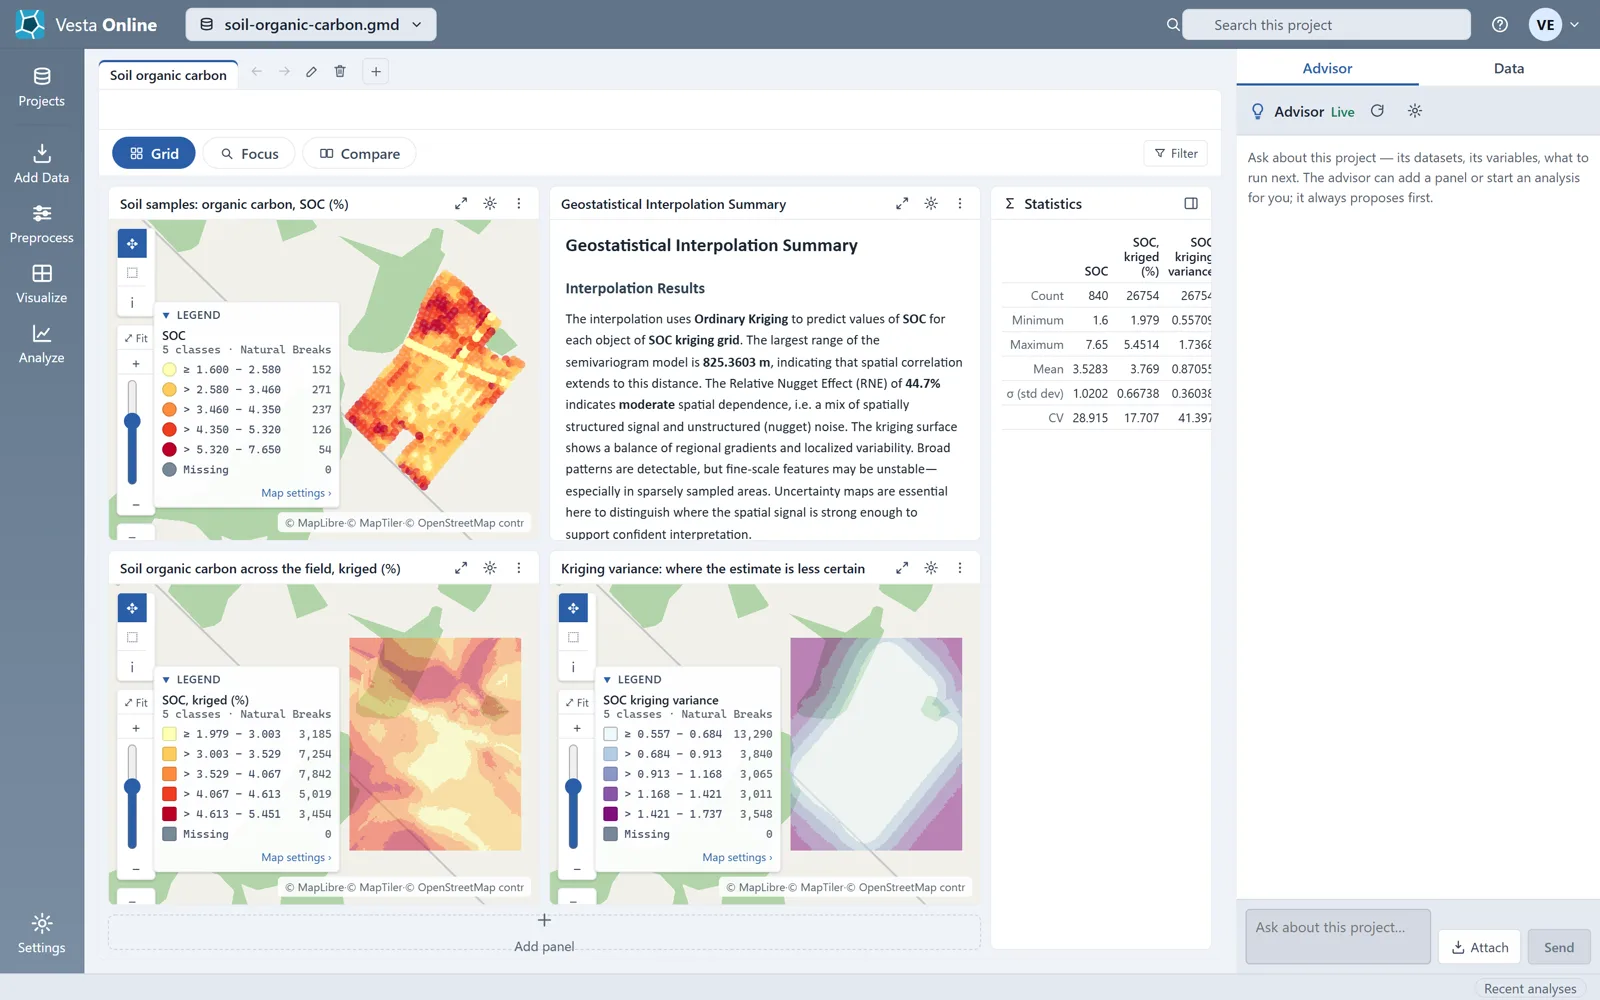
- Open the projectSelect the row and choose Open Project. The project opens in the workspace it was saved with. This one opens a workspace named Soil organic carbon with a map of the soil samples, a Geostatistical Interpolation Summary, two kriged maps (the estimate and the kriging variance) and a Statistics table.
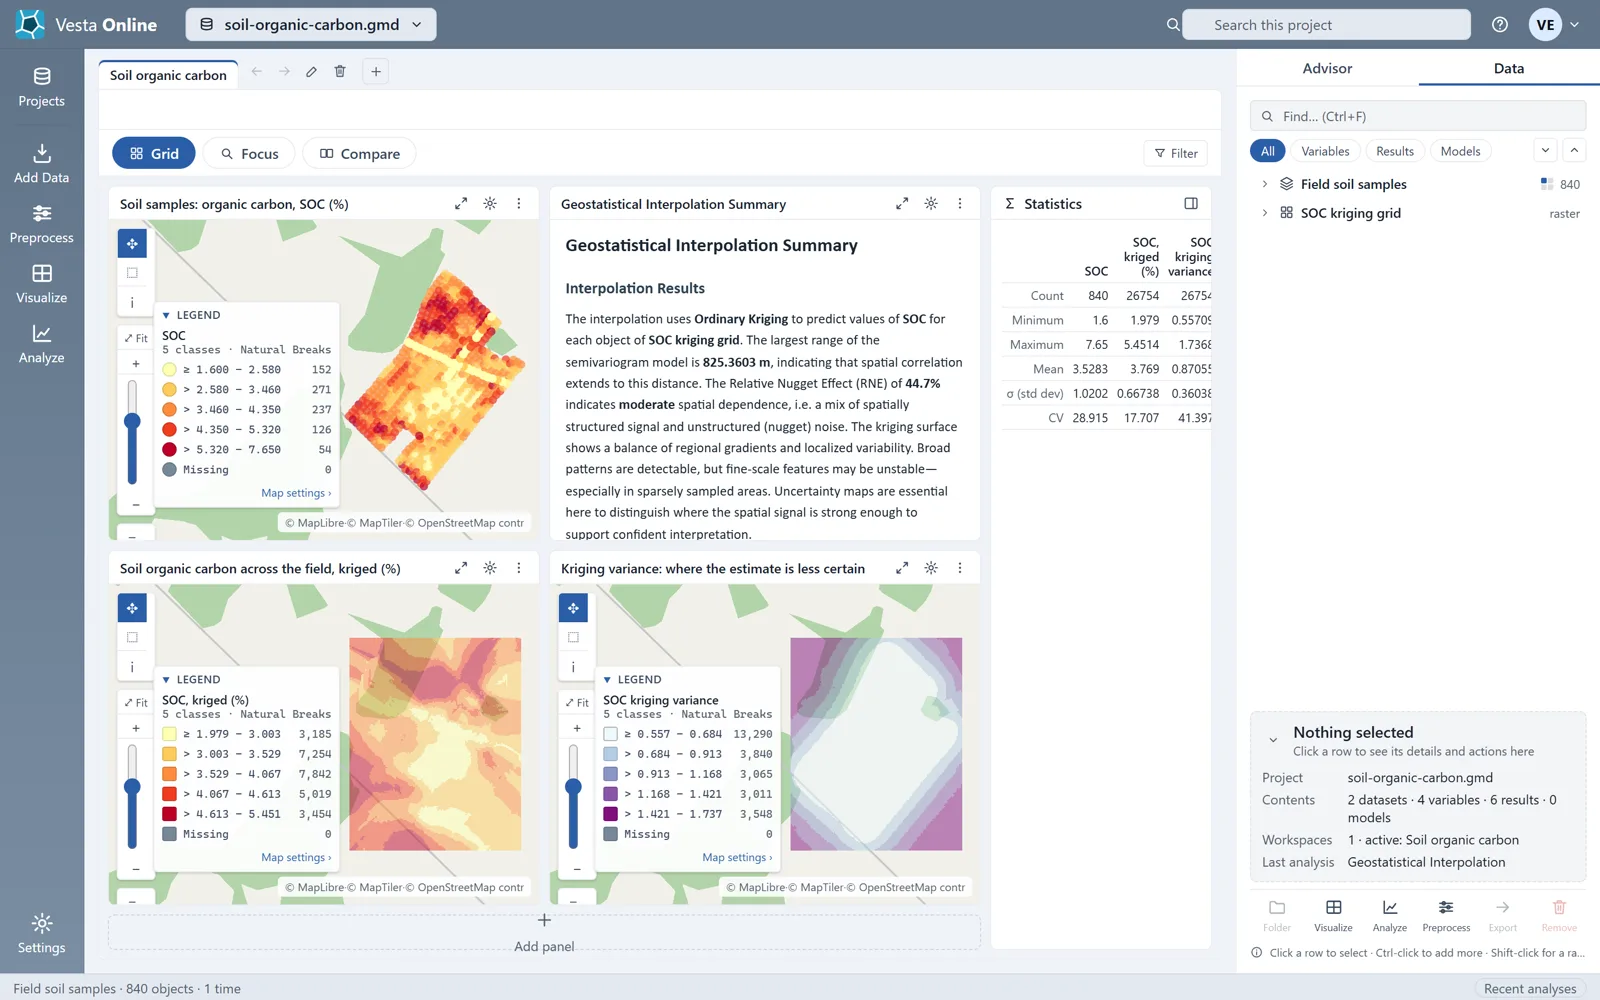
- Look at the datasetsChoose the Data tab on the right. It lists the project's datasets (here Field soil samples and SOC kriging grid, a raster) and sums up the whole project: 2 datasets, 4 variables, 6 results and 0 models, with 1 workspace, Soil organic carbon, and the last analysis, Geostatistical Interpolation.
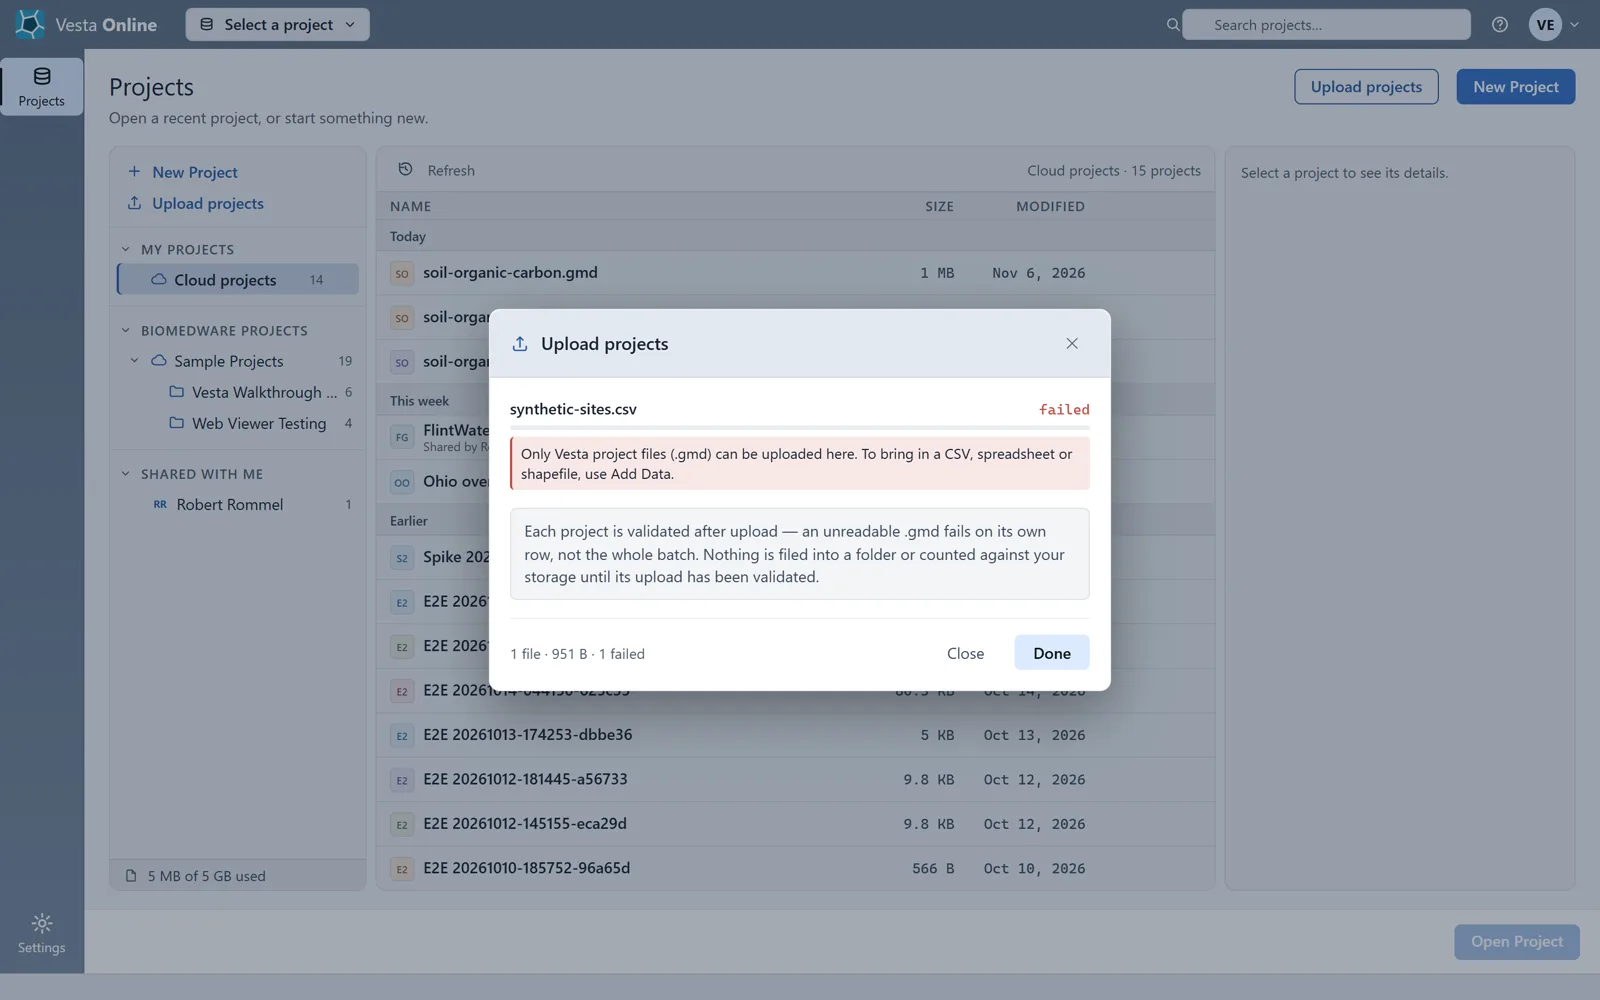
- Try a file that is not a projectOpen Upload projects again and pick a file that is not a .gmd, here a CSV. The picker does not send it to the server: its row shows an error that reads "Only Vesta project files (.gmd) can be uploaded here. To bring in a CSV, spreadsheet or shapefile, use Add Data." and offers no Retry, and no project is created. To bring a CSV, spreadsheet or shapefile into a project, use Add Data (see Importing data).
What carries over
Section titled “What carries over”For the project walked here, both datasets came across, the Soil organic carbon workspace with its saved panels, and the saved variogram and interpolation results, which the Data tab counts as 6 results and 0 models. That is one project: this page did not walk a saved variogram model, a saved Advisor conversation or any other kind of content. If something you expect is missing after an upload, check the Data tab, which counts datasets, variables, results and models.
The desktop side
Section titled “The desktop side”These steps are in Vesta desktop (Windows) and were not run for this page; they come from the desktop app’s source. Cloud actions need you to sign in; the app says Please sign in to use cloud projects. when you are not. Working with files on your own PC needs no sign-in.
Limits and your account
Section titled “Limits and your account”Uploads are checked against three limits, which are the server’s defaults and can be set differently for a plan or a user: 1 GB per project, 5 GB of storage per account, and 100 projects per user. An upload over a limit is refused with a message: Project exceeds the maximum size., Not enough storage remaining. or Project quota reached. The Projects page shows your storage use at the bottom of the folder list on the left, in the form “of 5 GB used”. One subscription covers Vesta Online and Vesta desktop.
Where next
Section titled “Where next”- Bring a table or public data into a project: Importing data.
- Share an uploaded project with a colleague: Sharing.
- Make a first map and analysis: Quickstart.